Add something new
Use this when something arrives that the building has never had before — a new model of chair, a desk from a different supplier. It creates the product (the thing, described once) and then places the first items of it (the actual units, in an actual room).
If the building already has this product, do not create it again. Open the room it is in and use Add inventory there instead — otherwise you end up with two catalogue entries for one chair.
How it goes
Start from Home
Tap Add product. This is the one entry point that assumes the thing is new.
Photograph it
Take a photo, or upload one from the phone. The first photo becomes the cover — it is what everyone recognises the product by later, so get the whole item in frame.
Choose how to describe it
Three ways forward:
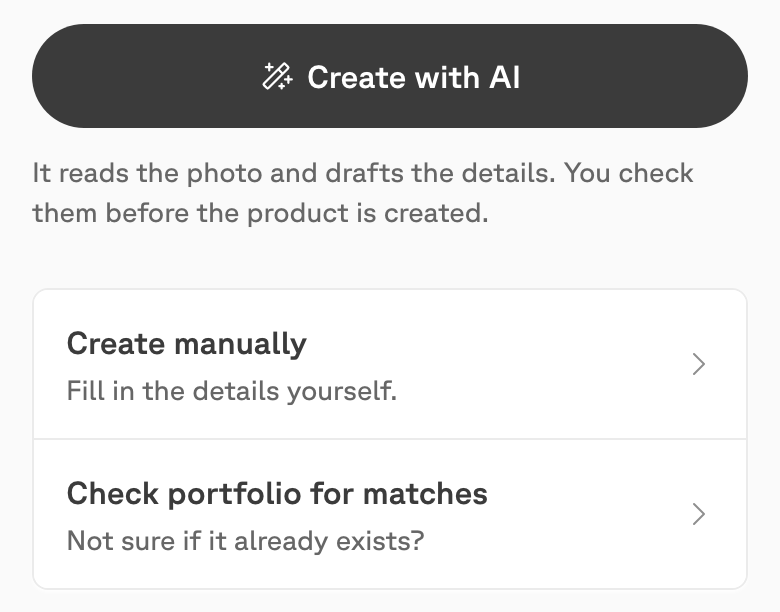
- Create with AI — it reads the photo and drafts the name, category and dimensions. You check them before anything is created.
- Create manually — fill in the details yourself.
- Check portfolio for matches — if you are not sure it is new, this looks for products that already exist.
Check the details
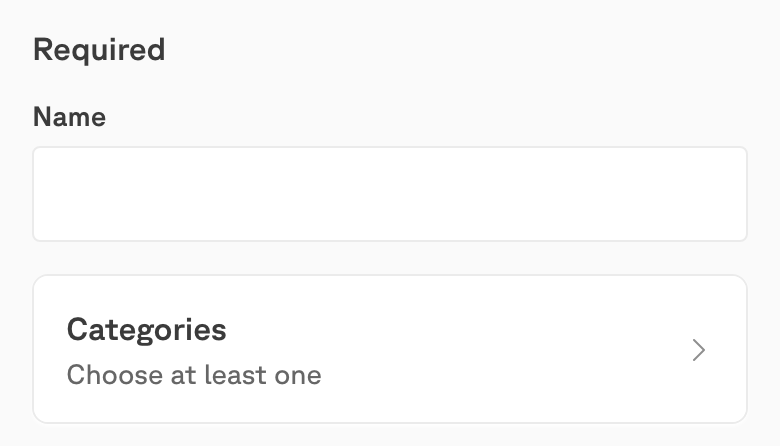
Only two things are required: a Name and at least one Category. Everything else — brand, colours, materials, dimensions, product code, notes — is optional and can be added later from the product’s own screen.
Creating the product does not add any stock. It only puts the thing on the books.
Place the first ones
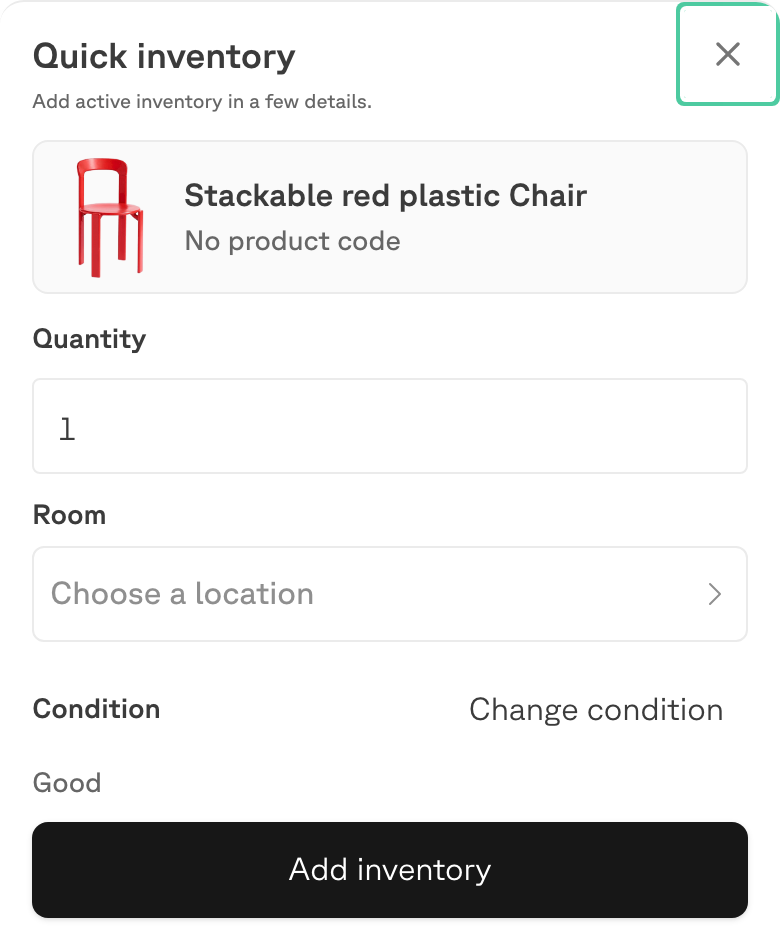
On the success screen, tap Add the first ones. Say how many, which room, and what condition they are in. That is the point at which the building’s item count changes — and where you choose whether the units are tracked individually. See Adding the first items below.
Photographing it well
The cover photo is how everyone recognises this product afterwards — in the app, in a list, and on the marketplace if it is ever resold. It is worth the extra minute.
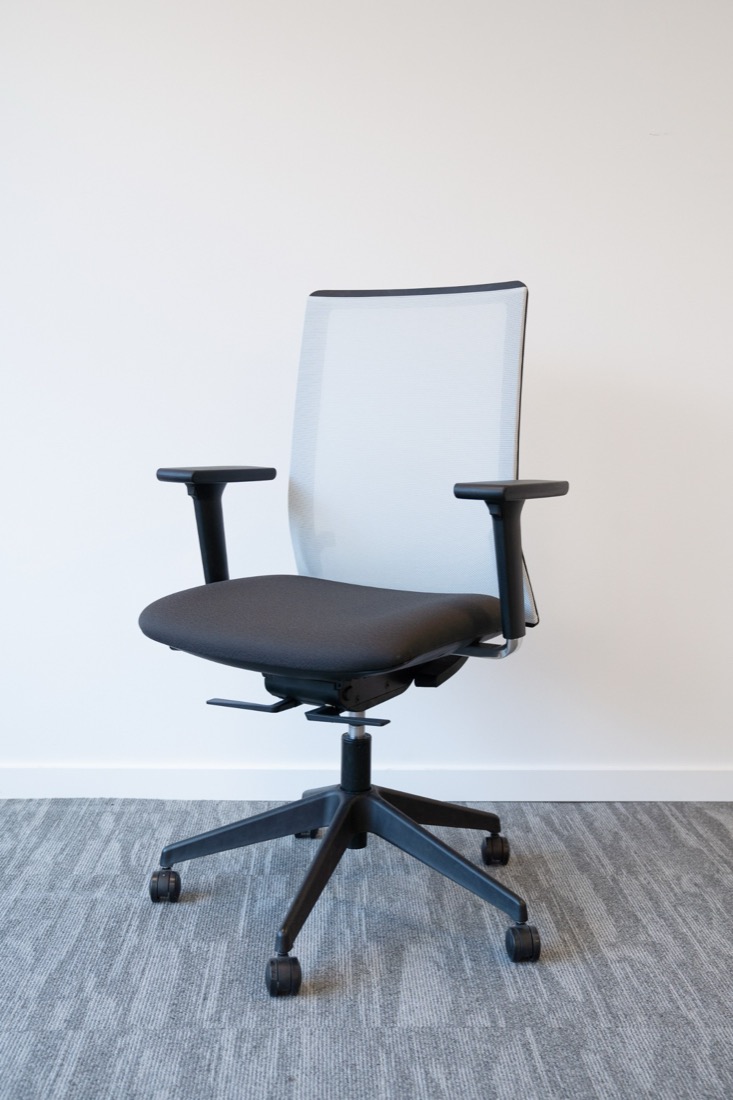
Relieve’s photography guidelines come down to seven things:
Find a minimal background
A plain background draws the eye to the item. Busy or complex surroundings distract, and make the item itself look like less.
Make sure the lighting is nice
Mix natural and indoor light. Too dark, or lit only by ceiling lights, and the photo comes out yellow.
Make sure the item is emptied and clean
Nobody can assess condition through someone’s paperwork. Empty the drawers, clear the desk, wipe it down.
Clear any other items nearby
The focus should be the item. Anything else in frame is clutter the next person has to look past.
Use a decent camera
A reasonably recent phone is fine. What matters is enough resolution to stand up online.
Shoot at the item’s own height
Crouch to the item if it is shorter than you. Photographing down at a chair gives you a picture of its seat, not of the chair.
Take five to seven images
At least one of each side, plus close-ups of anything interesting — a brand mark, a mechanism, a scuff that affects the grade.
The first photo you add becomes the cover. Add the others after it; you can come back and add more from the product’s own screen at any time.
Adding the first items
Creating the product put the thing on the books. It added no stock: the building’s item count has not moved. Add the first ones, on the success screen, is what puts actual units in an actual room.
You are choosing one of two things here, and the choice is worth understanding once because it governs everything the app can tell you later.
Untracked items — a quantity
Fill in Quantity, pick the Room, set the Condition, and tap Add inventory. The units join that room’s Counted as a balance figure.
They are real inventory. They appear in every total, they can be moved, re-graded and removed, and a stocktake counts them. What they do not have is an individual record: six of them are a six, not six things.
This is the right choice for almost everything. Identical stacking chairs arriving in a store room do not each need a history.
Tracked items — one QR code each
A tracked item carries a Relieve QR label and has its own screen, its own history, and its own comments. To add one, the app needs a code first — so you scan before you add, rather than after.
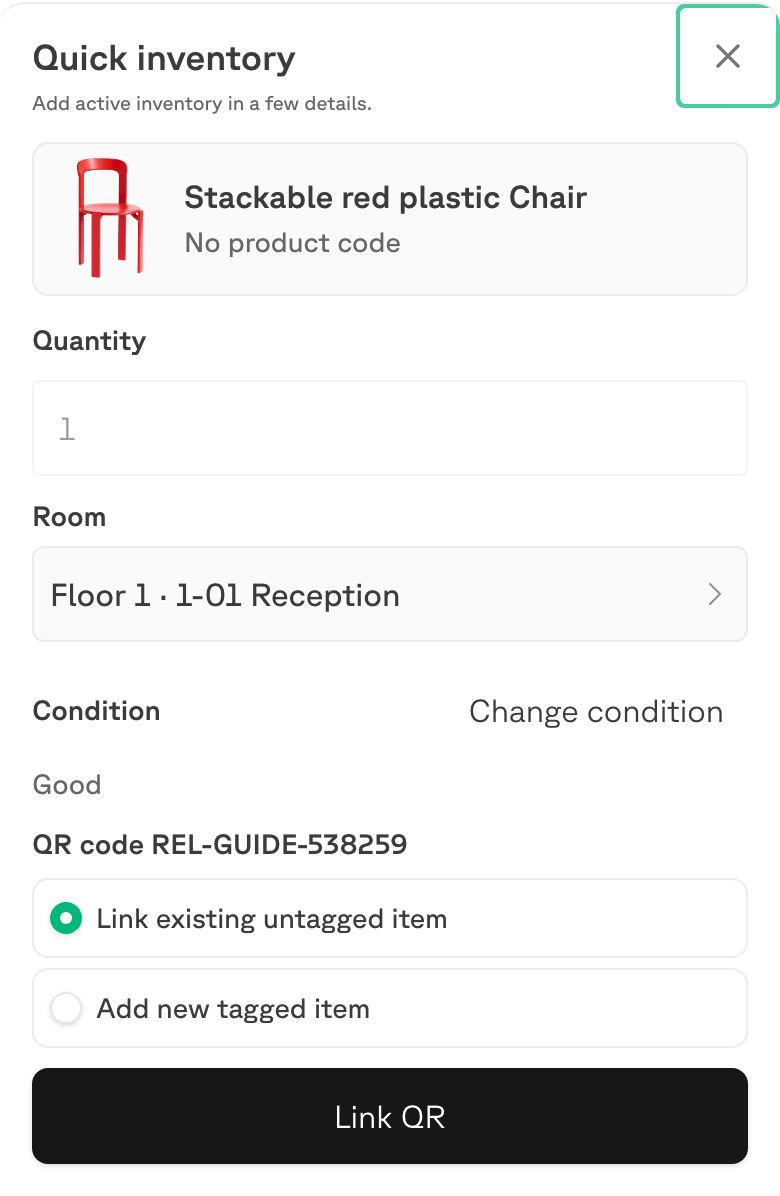
Two things a scanned code can mean:
| Choice | What it does |
|---|---|
| Link existing untagged item | Labels one of the units already counted here. The total does not change; it moves from the balance into the tracked column. |
| Add new tagged item | Adds one unit that was not here before, already carrying its code. |
For a product you have just created, Add new tagged item is the one that applies — nothing of it exists yet to label.
Worth knowing before a stocktake: tracked and untracked items are counted differently. An untagged quantity is typed in; a tracked item has to be scanned to be counted. See Count a room.
Tagging is covered on its own page — Tag an item with a QR code — including when it is worth the trouble.
Afterwards
The toast that appears carries an Undo, and the new units show up under Recent changes on Home for the rest of the day. The product now appears in Assets, with its rooms listed under Where it is.
The units you just placed have no QR labels yet — see Tag an item with a QR code for when and why you would give one its own label.